Concrete Patio Construction Guide: Finishes, Staining, and Pavers Explained
Reading time: 14 minutes
Ever stood in your backyard staring at a cracked, weathered slab and thought, “There has to be a better way”? You’re not alone. In 2026, outdoor living spaces have become one of the most sought-after home improvement investments — and the concrete patio sits at the heart of that transformation. Whether you’re starting from bare soil or upgrading an existing surface, understanding your options can mean the difference between a patio that lasts 40 years and one that embarrasses you at your first summer barbecue.
Well, here’s the straight talk: Building or renovating a concrete patio isn’t just about pouring cement. It’s about making strategic decisions on materials, finishes, drainage, and aesthetics that align with your budget, climate, and lifestyle. This guide walks you through everything — from excavation basics to staining techniques and paver installation — with practical, actionable advice you can actually use.
Table of Contents
- Why Concrete Patios Dominate Outdoor Living in 2026
- Planning and Site Preparation
- Core Construction Process Step by Step
- Concrete Finish Options: Texture, Look, and Performance
- Staining Concrete: The Art of Transforming Gray Slabs
- Concrete Pavers: Installation, Patterns, and Pros
- Finishes vs. Stains vs. Pavers: Which Is Right for You?
- Common Challenges and How to Beat Them
- Frequently Asked Questions
- Your Patio Project Roadmap: Next Steps
Why Concrete Patios Dominate Outdoor Living in 2026
The numbers tell a compelling story. According to the Home Improvement Research Institute’s 2025 Annual Report, outdoor living projects accounted for approximately $52 billion in U.S. home improvement spending, with concrete patio construction representing nearly 28% of that total. That figure continues climbing into 2026 as hybrid work models keep homeowners investing in their outdoor environments.
Beyond the economics, concrete simply performs. A properly constructed concrete patio can withstand freeze-thaw cycles, heavy furniture loads, and decades of foot traffic. It’s also one of the most design-flexible surfaces available — you can stamp it, stain it, expose the aggregate, or lay pavers on top to create entirely different aesthetic experiences.
Quick Scenario: Imagine you’ve just bought a home with a 400-square-foot backyard space. Your neighbor has a weathered wooden deck that requires annual sealing and board replacements. Meanwhile, you’re planning a concrete patio that — with the right finish and maintenance — could outlast the house itself. What choices determine whether your patio becomes a neighborhood showcase or a future headache? Let’s find out.
Planning and Site Preparation
Assessing Your Site Before You Break Ground
Every successful patio project begins long before the first shovel hits the dirt. Site assessment is your foundation — literally and figuratively. Here’s what you need to evaluate:
- Soil type and bearing capacity: Clay-heavy soils expand when wet and contract when dry, creating movement that can crack a slab. Sandy or loamy soils drain better but may require compaction.
- Slope and drainage: Your patio must slope away from your home at a minimum grade of 1/8 inch per foot (approximately 1%) to prevent water pooling near your foundation.
- Sun exposure: South-facing patios in hot climates can become uncomfortably warm during summer afternoons. Factor this into finish selection — lighter colors reflect heat; darker stains absorb it.
- Underground utilities: Always call 811 (in the United States) before digging. In 2025, utility damage from unpermitted excavation cost American homeowners an estimated $1.3 billion in repairs.
- Local permits: Most municipalities require permits for patios above a certain size threshold (often 200 square feet or more). Check with your local building department before starting.
Designing for Function and Flow
Before finalizing dimensions, think about how you’ll actually use the space. A dining area for six people needs at least 12 × 14 feet to feel comfortable. A lounge zone with chairs and a fire pit typically needs 15 × 15 feet minimum. Sketch your layout on graph paper or use a free design tool like RoomSketcher or Planner 5D — both updated their outdoor planning features significantly in 2025.
Also consider these design fundamentals:
- Expansion joints: Concrete expands and contracts with temperature changes. Plan for control joints every 8–10 feet in both directions to manage cracking.
- Edge treatment: A simple 45-degree chamfer, a bullnose edge, or a decorative border transforms the appearance dramatically.
- Transition zones: How will the patio connect to your lawn, garden beds, or interior spaces? These transitions affect both aesthetics and drainage.
Core Construction Process Step by Step
Let’s walk through the actual build process. Whether you’re hiring a contractor or tackling this as an ambitious DIY weekend project, understanding each stage keeps you informed and in control.
Excavation and Base Preparation
Start by excavating to a depth of 7–9 inches below your desired finished surface height. This accommodates a 4-inch gravel base plus a 4-inch concrete slab (the standard residential specification). For heavier use areas — like a patio that will support a hot tub or pergola structure — increase slab thickness to 6 inches and adjust accordingly.
After excavation:
- Compact the subgrade soil using a plate compactor (rentable for approximately $85–$120/day in 2026).
- Lay 4 inches of crushed stone or gravel base (Class II base rock is ideal) and compact thoroughly.
- Install your wooden or metal forms, checking for the proper slope with a level.
- Place wire mesh or rebar (#3 rebar on 18-inch centers) to reinforce the slab and minimize crack propagation.
Mixing, Pouring, and Finishing the Slab
For residential patios, a 4,000 PSI concrete mix (often labeled as “4-sack mix”) provides an excellent balance of strength and workability. In 2026, many concrete suppliers now offer fiber-reinforced mixes that incorporate polypropylene or steel fibers directly into the concrete, reducing the need for wire mesh and improving crack resistance by up to 40% according to data from the Portland Cement Association.
The pour sequence matters:
- Order ready-mix concrete (figure approximately 1.2 cubic yards per 100 square feet for a 4-inch slab, with 10% overage).
- Have at least two helpers — one managing the chute, one using a screed board to level the surface.
- Use a bull float to smooth the surface after screeding.
- Allow bleed water to evaporate before applying any surface finish.
- Broom finish, stamp, or expose aggregate while the concrete is still workable (typically a 1–3 hour window depending on temperature).
- Apply a curing compound or keep the slab moist for at least 7 days to achieve maximum strength.
Concrete Finish Options: Texture, Look, and Performance
This is where your patio goes from functional to fabulous. The finish you choose dramatically affects slip resistance, maintenance requirements, visual appeal, and cost. Here are the primary options available in 2026:
Broom Finish
The most common and cost-effective finish. A stiff-bristled broom is dragged across the fresh concrete to create linear texture grooves that improve traction. It’s practical, durable, and works in virtually any climate. Average cost: $6–$10 per square foot installed.
Exposed Aggregate
Fresh concrete is seeded with decorative stones (pea gravel, river rock, colored glass) then the surface paste is washed away to expose the aggregate below. The result is a naturally textured, highly slip-resistant surface with exceptional visual interest. A favorite for pool surrounds and walkways. Average cost: $10–$18 per square foot installed.
Stamped Concrete
Rubber or polyurethane stamps are pressed into fresh concrete to mimic the look of brick, stone, slate, wood planks, or tile. When combined with color hardeners and release agents, stamped concrete can be nearly indistinguishable from the materials it replicates. It’s the most popular decorative option — the American Society of Concrete Contractors reported in 2025 that stamped concrete installations grew 18% year-over-year, driven by homeowners seeking premium aesthetics at lower cost than natural stone. Average cost: $14–$28 per square foot installed.
Salt Finish
Rock salt is embedded into the fresh surface then washed away after curing, leaving a pitted, textured pattern. It creates a subtle, sophisticated look popular in Mediterranean and coastal architectural styles. Average cost: $8–$14 per square foot installed.
Staining Concrete: The Art of Transforming Gray Slabs
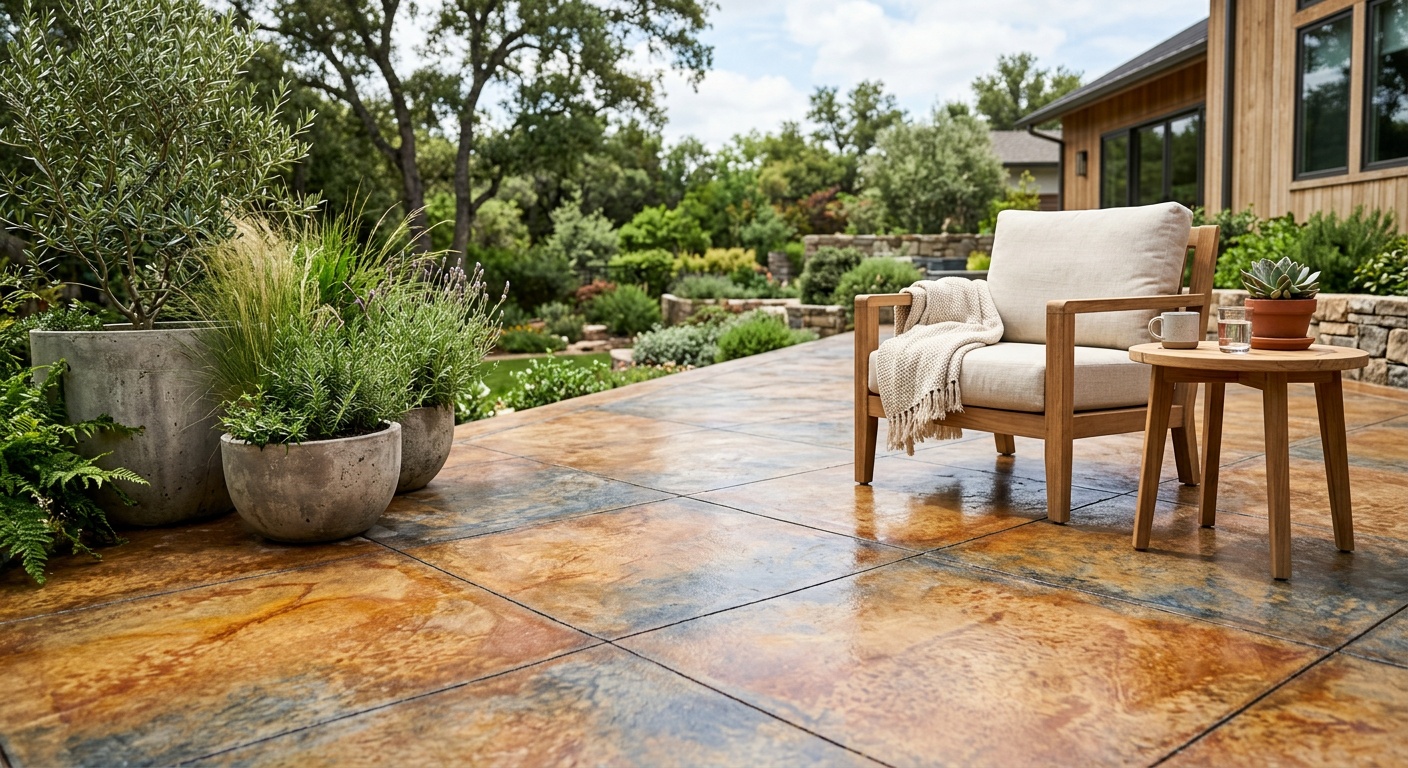
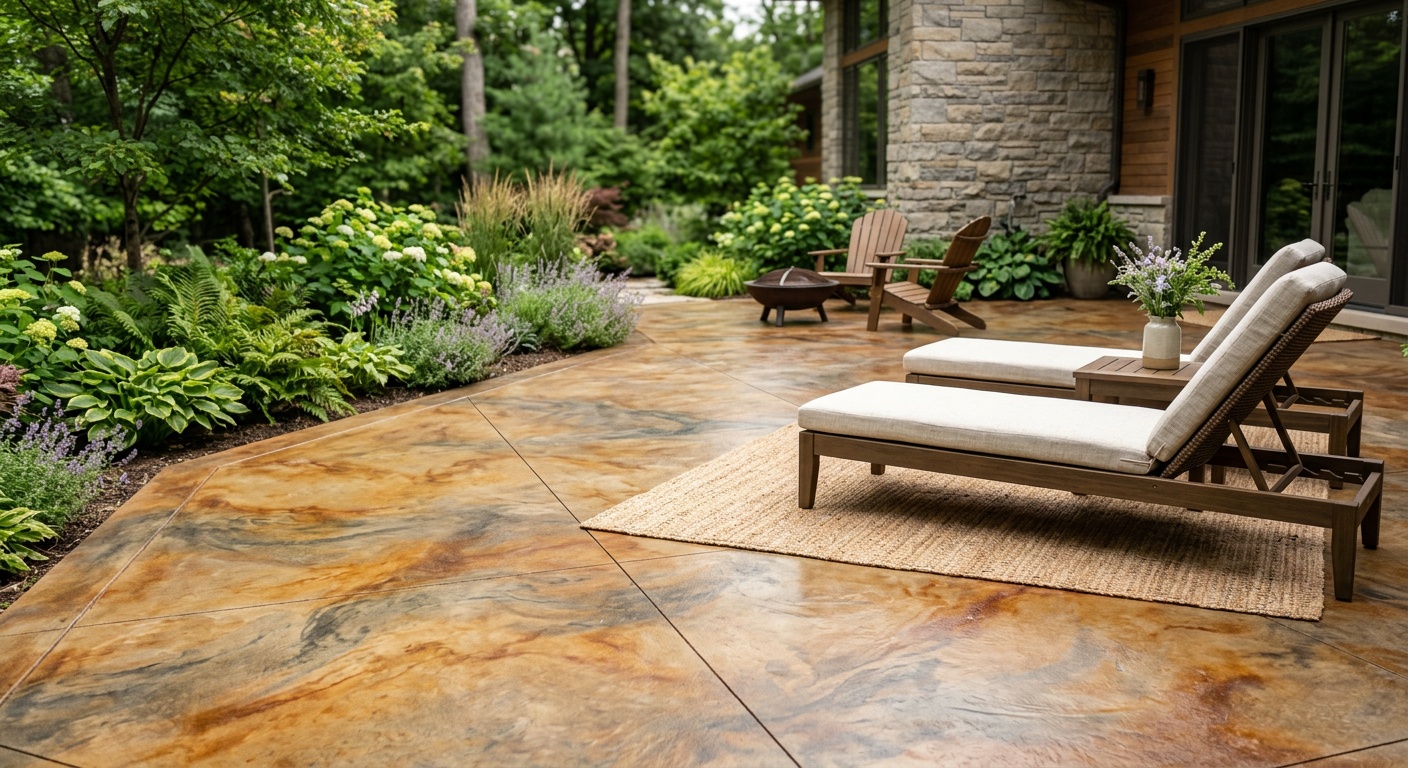
Here’s a game-changer many homeowners overlook: you don’t need to start from scratch to have a beautiful patio. Concrete staining can transform an existing dull gray slab into a rich, layered surface with the look of natural stone, aged leather, or vibrant contemporary color — often for a fraction of new construction costs.
Acid Staining vs. Water-Based Staining
These two approaches produce dramatically different results and require different application techniques:
Acid Staining: A chemical reaction between the acid (typically muriatic or phosphoric acid with metallic salts) and the minerals in the concrete creates permanent, variegated color that cannot peel or chip because it becomes part of the concrete itself. Colors are limited to earth tones — browns, tans, terracotta, blue-greens — but the mottled, organic appearance is strikingly beautiful. The process requires careful surface preparation (removing sealers, oils, and efflorescence), acid application, neutralization, thorough rinsing, and sealing.
Water-Based Staining: Unlike acid stains, water-based (also called acrylic stains) are pigmented coatings that penetrate the surface rather than react with it. They offer a wider color range — including blues, reds, blacks, and whites — and are easier to apply consistently. They’re also more environmentally friendly. The trade-off is that they sit closer to the surface and may require more frequent resealing (typically every 2–3 years vs. 3–5 years for sealed acid stain).
Step-by-Step Staining Process
- Surface Preparation: Grind or shot-blast any existing sealer. Fill cracks. Degrease thoroughly. This step determines 70% of your final result.
- Test Area Application: Always test a 2-square-foot area first. Concrete from different pours, ages, and mixes reacts differently to stains.
- Application: For acid stains, use a pump sprayer in circular or random patterns. For water-based stains, use a brush, roller, or airless sprayer depending on the desired effect.
- Second Coat (optional): Multiple coats build depth and intensity.
- Neutralize and Rinse (acid stain only): Mix baking soda and water (1 cup per gallon) and scrub the surface, then rinse thoroughly.
- Sealing: Apply 2–3 coats of a penetrating or topical sealer. In 2026, polyaspartic sealers have become the industry standard for UV resistance and durability.
Pro Tip: If your patio has expansion joints, consider highlighting them as design features using a contrasting grout or caulk color after staining. Turning a functional necessity into an intentional design element is the hallmark of a professional finish.
Case Study — Phoenix, Arizona, 2025: A homeowner with a 600-square-foot concrete patio from 2011 used a combination of terra cotta acid stain and a charcoal water-based overlay on the borders. The total project cost approximately $1,800 in materials and professional labor for two days. The result looked remarkably similar to a Mexican saltillo tile installation that would have cost over $12,000 to install properly.
Concrete Pavers: Installation, Patterns, and Pros
Concrete pavers offer a fundamentally different approach to patio construction. Instead of a monolithic poured slab, you’re installing individual modular units over a prepared base — creating a surface that’s flexible, repairable, and endlessly customizable.
Why Pavers Are Gaining Market Share in 2026
The Interlocking Concrete Pavement Institute (ICPI) reported in early 2026 that permeable paver installations increased by 22% in North America compared to 2024, driven largely by municipal stormwater regulations and homeowner interest in eco-friendly construction. Permeable pavers allow rainwater to percolate through joints into a gravel base, reducing runoff — a meaningful benefit in flood-prone regions.
Additional reasons homeowners and contractors favor pavers:
- Repairability: Individual units can be lifted, replaced, or re-leveled without disturbing the entire surface.
- No curing time: The patio is usable immediately after installation.
- Design flexibility: Hundreds of shapes, sizes, colors, and patterns are available.
- Freeze-thaw performance: The flexible joint system accommodates ground movement without cracking.
Paver Installation Process
Installing concrete pavers correctly requires attention to base preparation above all else. A shifting base is the number-one cause of paver failure.
- Excavate to 10–12 inches below finished surface (accommodating 6 inches of compacted gravel base, 1 inch of bedding sand, and paver thickness which typically ranges from 2.375 to 3.125 inches).
- Install edge restraints (plastic, aluminum, or concrete) to prevent lateral movement of the paver field.
- Compact the gravel base in 4-inch lifts.
- Screed 1 inch of coarse bedding sand (ASTM C33 concrete sand) to create a level setting bed.
- Lay pavers in your chosen pattern, maintaining consistent joint spacing of 1/8 to 3/16 inch.
- Compact the pavers with a plate compactor (use a rubber pad to protect the surface).
- Sweep in joint sand (polymeric sand is strongly recommended — it hardens when wet to inhibit weed growth and ant intrusion).
- Final compaction and edge cleanup.
Popular Pattern Options: Running bond (offset like brickwork), herringbone (45° or 90°, excellent for driveways), basketweave, random ashlar, and circular fan patterns. Herringbone at 45° is considered the most structurally stable pattern for areas with vehicular loads.
Finishes vs. Stains vs. Pavers: Side-by-Side Comparison
Making the right choice means understanding the trade-offs. This table gives you the essential metrics at a glance:
| Metric | Broom/Stamped Finish | Acid/Water-Based Stain | Concrete Pavers |
|---|---|---|---|
| Average Cost (per sq ft) | $8–$28 | $3–$10 (existing slab) | $15–$35 |
| Lifespan (maintained) | 25–40 years | Indefinite (resealable) | 30–50 years |
| Maintenance Level | Low–Medium | Medium (reseal 2–5 yrs) | Low (re-sand joints) |
| DIY Friendly? | Moderate challenge | Yes (water-based) | Yes (with preparation) |
| Repairability | Difficult (visible patches) | Moderate (restaining) | Excellent (unit replacement) |
Homeowner Satisfaction Ratings by Finish Type (2025 Survey Data)
Based on a 2025 survey of 1,200 homeowners conducted by Remodeling Magazine, satisfaction scores (out of 100) by patio surface type were:
Common Challenges and How to Beat Them
Challenge 1: Cracking Concrete
Cracking is the most common complaint among concrete patio owners. The good news: most residential cracking is cosmetic, not structural. Hairline cracks under 1/8 inch wide typically result from shrinkage during curing and can be filled with a flexible polyurethane caulk matched to your slab color. Wider cracks (1/4 inch or more) may indicate subgrade settlement or poor base preparation and warrant professional evaluation.
Prevention strategy: Proper joint placement (every 8–10 feet), adequate reinforcement, correct water-cement ratio during mixing, and proper curing are your best defenses. Never add extra water to a concrete mix to make it easier to work with — every additional pound of water per 100 pounds of cement reduces compressive strength by approximately 1,000 PSI.
Challenge 2: Stain Color Inconsistency
Many DIYers are surprised when their acid stain looks blotchy or dramatically different from the showroom sample. The reality: acid stain reacts with the unique mineral chemistry of your specific concrete, and results will always vary. Patches, repairs, and different concrete pours will stain differently than the original slab.
Solution: Embrace the variation as part of the aesthetic — it’s actually what makes acid staining look like natural stone. For more predictable results, choose water-based stains, which behave more like paint. Also, always complete a test patch and seal it before committing to the full area.
Challenge 3: Paver Settlement and Shifting
Over time, pavers can settle unevenly, creating trip hazards and pooling water. This almost always traces back to inadequate base compaction or edge restraint failure.
Solution: When settling occurs in isolated areas, it’s actually one of the biggest advantages of pavers — you can lift the affected units, add or remove sand as needed, re-lay, and compact. No jackhammers required. To prevent settlement, never skip the plate compactor, always install edge restraints before laying the field, and use polymeric sand to lock joints and resist washout.
Case Study — Minneapolis, Minnesota, 2026: A contractor in the Twin Cities area replaced a failed broom-finished concrete slab (approximately 480 square feet) that had developed three major cracks over seven winters with a permeable paver system using Belgard’s Aqua Roc units. The permeable base dramatically reduced ice formation because it drained rapidly. The homeowner’s first winter post-installation saw zero hazardous ice patches — previously a seasonal safety concern.
Frequently Asked Questions
How long after pouring concrete can you walk on a new patio?
You can typically walk on a freshly poured concrete patio after 24–48 hours, but this doesn’t mean the concrete is fully cured. Concrete achieves roughly 70% of its design strength at 7 days and full strength at 28 days. Avoid dragging heavy furniture, operating a grill, or placing heavy planters on the surface until the full 28-day curing window is complete. In colder temperatures (below 50°F / 10°C), curing slows significantly — use insulating blankets and extend your wait time accordingly.
Can I stain an old concrete patio that has existing sealer on it?
Yes, but you must remove the existing sealer first. Stains — both acid-based and water-based — need to penetrate the concrete surface to bond properly. Over an existing sealer, the stain will simply sit on top and peel off prematurely. Use a chemical stripper specifically designed for concrete sealers, followed by mechanical grinding if needed (a floor grinder with 40-grit tooling works well), then clean thoroughly with a degreaser and neutralize before staining. Skipping this step is the single most common cause of failed staining projects.
Are concrete pavers more expensive than poured concrete in the long run?
The initial installation cost of concrete pavers is generally 20–40% higher than a comparable poured concrete patio. However, the long-term cost equation often favors pavers. A cracked poured slab typically requires demolition and replacement (full cost again), while individual paver units can be replaced for a few dollars each. In a 2025 lifecycle cost analysis by the ICPI, pavers demonstrated lower total cost of ownership over a 25-year period in climates with significant freeze-thaw cycling, due primarily to elimination of repair and replacement costs. For mild climates with stable soils, the cost difference narrows considerably.
Your Patio Project Roadmap: Turning Plans Into Beautiful Outdoor Space
You now have the foundational knowledge to approach your concrete patio project with confidence and clarity. As outdoor living continues to dominate home improvement trends through 2026 and beyond — particularly as climate-responsive design becomes a priority — the decisions you make today about materials, finishes, and drainage will shape how you experience your outdoor space for decades.
Here’s your practical action roadmap:
- Define your goal this week: Are you building new, upgrading an existing slab, or exploring pavers? Nail down your primary objective and budget range before anything else.
- Assess your site: Evaluate soil type, drainage patterns, sun exposure, and utility locations. Pull the necessary permits from your local building department.
- Choose your finish strategy: Use the comparison table in this guide to match your budget, climate, and aesthetic goals to the right surface type.
- Get three contractor bids (or a detailed materials list for DIY): In 2026, labor costs for skilled concrete work typically range from $45–$85 per hour. Getting multiple quotes helps you identify fair pricing and red flags.
- Plan for maintenance from day one: Budget for sealing (every 2–5 years), joint sand replenishment for pavers, and annual cleaning. A maintained patio is a permanent investment; a neglected one is a future demolition project.
“The best time to think about patio maintenance is before you build it — not after the first winter damages it.” — Mark Donovan, HomeAdditionPlus.com contractor consultant, 2025
As sustainability concerns grow, consider that permeable paver systems and recycled aggregate concrete are moving from niche solutions to mainstream choices. By 2027, several major metropolitan areas are expected to offer rebates or permit fee waivers for permeable hardscape installations that reduce municipal stormwater loads.
Your outdoor space is an extension of how you live — it deserves the same intentional design thinking you’d bring to any interior room. So here’s a question worth sitting with: Which finish or surface best reflects not just how your patio looks today, but how you want to feel stepping outside every single morning for the next 30 years? That answer is your starting point for everything.